
NOTE - To upload a contacts CSV file via the Admin Panel you will need to have access to the Admin Panel. Please contact you 3CX administrator if needed.
1. Download the 3CX contact Template
https://www.dropbox.com/sh/8iafjjmdkcjjqc5/AABvxzgcM94XNbbZ1rDEvi29a?dl=0
2. Fill in all the necessary details for your contacts.

ensure that the Phone Number formatting is in the <country code><area code minus the '0'>
e.g. 61731213060
3. Log into the 3CX Admin Panel via:
https://<client name>.3cx.com.au/
User Name - Extension Number
Password - Web Client Password
4. When the 3CX Admin Panel loads, you will find the 'Contacts' under the 'Advanced' tab.
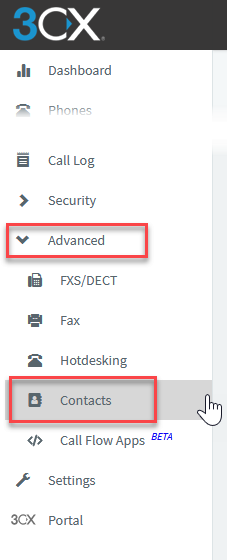
5. From here you will see all the current contacts in the system and the options to manage the 3CX contact list.
Add - Add a new contact
Edit - Edit the selected contact
Delete - Delete the selected contact
Import - Import contacts from a CSV file
Export - Export the current list that is displayed. (Note this export can be just the displayed Search result)
Option - display the options that relate to the contacts.
Match Call ID's to a contact entry - specify ho many characters to match for the Call ID. (default = 6)
Phonebook display - format that the phonebook is displayed.
Add Group, Queue or DID/DDI to Caller ID - This specifies how the Caller ID is displayed
You also have the option to search within the contact list.
6. To import a fresh contact list or any new contacts, click the 'Import' button and select the CSV file.
NOTE - the Import function will always create a new contact. If you are wanting to update an existing contact then please use the Edit button.
If you have any issues or question with regards to this process please contact M1IT Systems at support@m1it.com.au
Comments
0 comments
Article is closed for comments.