
To access this option, you will need to have admin rights added to your user. If this is needed please contact support.
1. Login to the Admin Portal with your login credentials.
*Please note that the web address for the admin portal is the same as the webclient, but without /webclient/
For example if your web client address is https://clientname.3cx.com.au/webclient/ then your admin portal address will be https://clientname.3cx.com.au
2.Once the Portal is loaded, Head to 'Settings>Timezones, Office Hours & Holidays'

3. You will see three sections. Timezone, Configure Office Hours and Configure Holidays.
To set a Custom Out of Office for a certain day or Holiday, click 'Add' within the 'Configure Holidays' section.

4. Fill in all the necessary details for the Custom Out of Office Schedule.

5. With the message you can either choose from a existing recorded message from the drop down selection. Or, you can record a new message.
If you wish to have the customer leave a voicemail then skip to step 9.
To record a new message, select 'Record'.

6. On the next screen, you will be asked to name the recording and also the Extension that you wish to record the message from.

7. Once you click 'OK' the extension will ring and you will be prompted for the message that you wish to record. Once
When you are finished with the message, press the '*' key to finish recording. To listen to the recording press '1', if you are happy with the recording and wish to save it press the '0'.
8. Once finished with the recording you will be back at the 'Configure Holiday' window. If all the information is correct.
9. Click 'OK', You now have finished the 'Configure Holiday' setup.
To add the ability for the customer to leave a voicemail continue these steps.
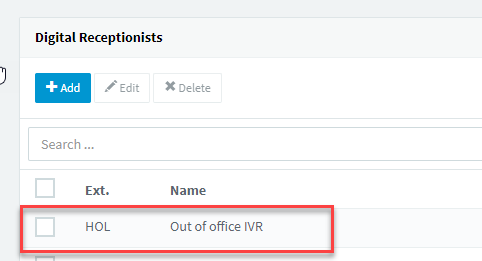
10. If you leave the message empty in the Holiday Schedule above then the system will know to divert the call to the 'Digital receptionist' and activate the 'HOL' feature.
11. To setup the 'HOL' settings, navigate to the 'Digital receptionist' option on the left menu.
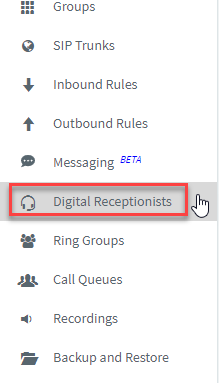
Select the 'HOL' extension in the list.
12. Once the settings for the 'HOL' Extension are loaded. Leave the Prompt blank and navigate to the bottom option for 'Destination for invalid or no DTMF input'.
You need to select '1' in the 'If no input within seconds' option and then select the destination to be transferred to. e.g. Receptionist Voicemail.
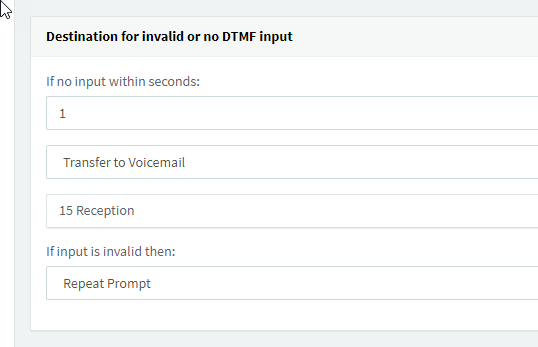
13. This will cause the customer to be directed to the destination set in step 12.
You will now need to set the Recording on the voicemail of the destination extension.
The steps for this are:
If you would like a custom message set then we can create these for you.
If you have any questions or trouble with the above process, please notify us at support@m1it.com.au
Comments
0 comments
Please sign in to leave a comment.